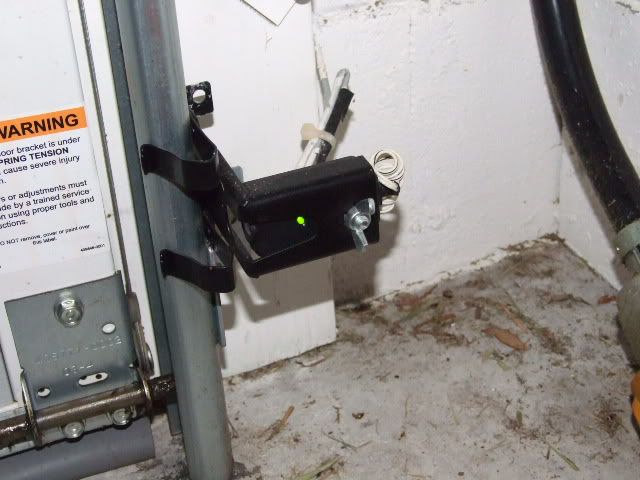
Garage Door Safety Sensor – An Overview
All modern garage door openers are equipped with all types of technologically advanced gadgets that make life easier for garage door owners. We take these garage door gadgets and accessories for granted, but there was once a time when people don’t even have these conveniences. One great advancement in garage door openers is their safety sensors, which have been an industry standard since the mid-1990s.
The standard sensor for garage door openers is a two-part optical garage door sensor Houston that detects whether the door is closed and whether someone is obscuring the path of the door underneath. This serves as a safety measure so that nobody gets crushed underneath a rolling garage door. This type of garage door opener sensor may seem to be very simple, but they do work.
Garage door safety sensors send and receive an infrared beam in order to prevent the door from closing when there’s someone or something

Garage Door Sensor
underneath it. These are the two parts of the sensor. A garage door safety sensor always has a transmitter, which sends the signals, and a receiver and these are both located on opposite sides of the door, specifically near the ground. If they detect that an object or a person is obstructing their way, the garage door then reverses and does not close.
Knowing the importance of a garage door opener sensor, owners should make sure that the sensors are working properly. If it fails, the lights usually flash or blink and the door won’t close properly.
Installing the Garage Door Safety Sensor
The garage safety sensors usually come with the garage door opener. Most garage door openers have installation manuals that owners can follow. However, certain technical aspects may be challenging for weekend Do-It-Yourself warriors. Here are the general steps in installed a garage door safety sensor: The first thing to do is to push the safety sensor against the bracket to be able to secure the two parts together. This should be done for both sensors. When both sensors are secure, press the clip of the bracket on the garage door track. They should be near the ground, approximately 6 inches above it. Remember that both sensors should be positioned facing the opposite side of the doorway.
The next few steps require certain wiring proficiency. The wiring should be set-up and placed against the garage’s interior wall until it reaches the overhead motor. After this, the sensors should be activated and tested. The most complicated part of installation for a DIY homeowner is the wiring.
Our busy lives sometimes prevent us from taking care of some household tasks such as installing a garage door opener sensor. This is when garage door installation services come in. They can help harried and busy homeowners take care of their garage door sensor needs.
